
Delicate latte topped with velvety milk froth or the classic, naturally sweet, perfectly creamy cappuccino — these are two pleasures that are impossible to resist. Most of us tend to enjoy milk-based coffee drinks in cafés and restaurants, leaving it up to professional baristas to study the numerous subtleties involved in their preparation. However, you may still catch yourself wondering from time to time, ‘Would it be possible for me to froth milk for a cup of latte or cappuccino by myself, in the comfort of my own home?’
In this post, we’ll reveal the story behind the friendship of milk froth and coffee, introduce you to the classic milk-based beverage recipes and tell you how to choose the right milk for your froth-topped drinks. Finally, we’ll present the most popular frothing methods used by people at home: from the simplest ones to those that require some skills and regular practice. We’ve even prepared a couple of lessons that might encourage you to try your hand at latte art! So read through this post, roll up your sleeves and get to work — sweet, silky, creamy milk froth is definitely worth it!
Milk Froth and Coffee: An Invention of the 20th Century
Even though the combination of coffee and milk is seen as commonplace nowadays, this was not always the case. At the beginning, once coffee started gaining popularity in the Arab world, it was valued precisely for its intense taste. However, when the drink reached the shores of Europe in the 17th century, people started mixing it with milk. This was perhaps due to the European palette not being used to strong, spicy flavours — milk softened the more intense tastes a bit. It’s important to note though that this is regular milk — not milk froth — we’re talking about here. The latter took some more time to come to the knowledge of coffee drinkers.
Just like most coffee-related inventions, the idea of frothed milk can be traced back to Italy. In 1938, it was introduced by Achille Gaggia, a café owner from Milan. Having improved his espresso machine a bit, he started offering his clients the option of flavouring their coffee with warm, light milk froth instead of regular cold milk.
World War II started a year later, slowing the rapid rise of the popularity of milk-based drinks — nevertheless, as soon as the war was over, the age of cappuccino dawned in Italy. This is when the traditions and rules related to how and when milk-based coffee should be prepared and consumed finally came to be. Most of them are just as relevant today. For example, in Italy, cappuccino is only consumed until 11 AM. Ordering a cup later on in the day is tantamount to asking for some ketchup with your pizza or breaking your spaghetti in half before putting it in the pot! While the majority of similar strict instructions remained confined to the Apennine Peninsula, the recipes themselves — e.g. the coffee to milk ratio or the texture of milk froth — turned into the accepted global standard.
Coffee With Milk Froth: Key Recipes

Pretty much every one of us is familiar with the names of the most popular milk-based coffee beverages — cappuccino, latte, espresso macchiato… However, encountering somebody who actually knows the difference between these drinks is still a rarity. In fact, all of these recipes are espresso-based. The only difference between them lies in the milk. It’s the quantity and thickness of milk froth that separate these beverages from each other. Although there are countless recipes for milk-based coffee drinks nowadays, we’ll be focusing on the classic ones in this post.
Cappuccino
We’ve already mentioned that for most Italians, cappuccino is exclusively a morning drink, consumed no later than at 11 AM. Nevertheless, this beverage is now extremely popular all over the world and is enjoyed at any time of day. According to fans of cappuccino, the ratio of coffee to milk in this drink is absolutely perfect.
Cappuccino consists of three components, each of which takes up one third of the resulting drink. So, if you’re looking to purchase the ideal cappuccino cup, pick one whose overall capacity can be divided into three equal parts: one for espresso, one for warm milk and one for milk froth. Proper cappuccino should be served at no more than 65 °C. If you’re intent on preparing the classic version of this beverage, keep in mind that there should be a ring of coffee surrounding the milk froth — it’ll help you enjoy each of the three components in equal amounts with every sip. Fans of strong coffee can use a double portion of espresso, although that will, of course, affect the traditional ratio. Nevertheless, if you want the fullness of espresso to penetrate through the smooth veil of milk, this is the only way to achieve that.
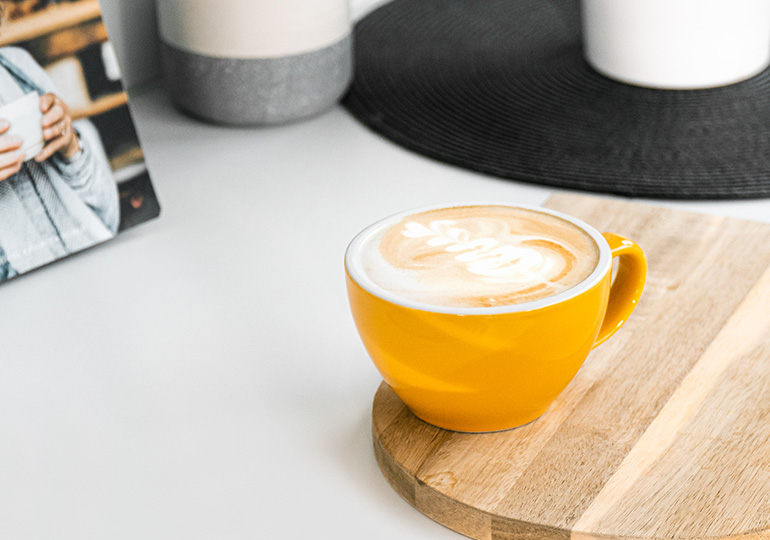
Latte
This is another classic Italian morning drink, yet a larger amount of milk makes its taste a bit more subtle. Latte consists of espresso, a near full cup or a whole glass of warm milk and as little as one centimetre of milk froth. It should be served at around 70 °C. Latte of the highest quality must also be adorned with a drawing created using milk froth (we’ll try and learn how to do that later on!).
Latte macchiato
This is a variation of the classic latte — the recipe and ingredients of this drink are identical to those of latte, but latte macchiato requires you to pour milk into the cup first and then add espresso. As a result, the surface of the beverage remains white and doesn’t mix with the crema. This may make latte macchiato seem a tad weaker than regular latte.
Espresso macchiato
Another classic Italian recipe! In Italian, macchiato means “marked”. The espresso in this beverage is indeed “marked” with a few spoonfuls of milk froth, which endow the drink with some pleasant sweetness. If you want to try espresso macchiato, simply prepare a portion of espresso, pour it into a cup and put a few spoonfuls of milk froth onto the very centre of the drink. The crema should then move to the side and form a ring similar to the one seen in a cup of cappuccino. By the way, this drink is often referred to simply as “macchiato”.
Flat white
Originating from Australia and New Zealand, this beverage has become a key player amongst milk-based coffee drinks as of late. In it, coffee and milk are equal partners: the ratio of milk to coffee is 50/50. Numerous variations of this recipe are encountered in different parts of the world. However, the most popular one includes espresso (the portion may be double or even triple — as long as it fills up half of the cup) and warm milk, with as little milk froth as possible. Flat white is usually served at no more than 70 °C — nevertheless, it can be a tad hotter too, as the larger amount of milk cools it down anyway. Just like latte, flat white is often adorned with beautiful milk froth drawings.
What Kind of Milk Is Best Suited for Frothing?
We could write a whole treatise on this topic — and we’re not even joking! Coffee connoisseurs, experts and baristas examine various milk varieties down to the smallest detail. They analyse how each of these varieties affects the final result and the whole milk frothing process. They’re even searching for breeds of cattle that produce milk best suited for preparing coffee! This may sound really interesting, but you’re probably not going to go on a search for the best cow out there yourself — so we’re going to provide you with some basic guidelines instead:
Fat content. Any type of milk can be frothed, whether it’s whole, semi-skimmed or skimmed, yet the taste and texture of each of these milk froths will differ. The less fat there is in your milk, the easier it’ll be for it to turn to foam and become properly “raised” (this is due to reasons related to the interaction of protein and fat during the process of frothing). That’s why beginner baristas are usually advised to start training with semi-skimmed or skimmed milk. You should keep in mind though that the flavour of such milk is “drier” and the resulting milk froth is a tad “crispier”. Whole milk is harder to froth, but the milk foam it produces is perfectly sweet and delightfully creamy. Pretty much all professional baristas agree that the best results are achieved with the help of natural whole milk (with a fat content of 3.5–4% or more). Sure, it may not be as healthy, but it’s incredibly delicious!
Protein. In general, the fat content of your milk is responsible for the taste and texture of the resulting milk froth, but when it comes to it being properly raised, this is all down to protein. The protein content of the milk you use should be no less than 3.0 g per 100 g. Luckily, most milks found in supermarkets meet this requirement.
Milk temperature prior to frothing. It’s extremely important to keep your milk cool prior to frothing (it should be fridge-temperature once you’re ready to start frothing). Warm milk causes proteins to split, so frothing it properly is much harder.
Freshness. The fresher the milk is, the easier it’ll be to froth. Keep in mind that you should never froth the same portion of milk twice — it simply won’t work (this, again, is due to split proteins).
Plant-based milk. You can also produce milk froth using plant-based drinks, such as oat, soy, almond, coconut or other nut milks. Some of them may not result in foam that’s particularly great though — it’s often not as consistent and “stable” as the one produced using cow’s milk. According to baristas, if you’re going to use a plant-based drink, oat milk would be your best bet: its fat and protein content is high enough for the resulting froth to be quite similar to the one produced using whole cow’s milk. Still, such froth is not as long-lasting.
All in all, you can produce milk froth using any type of milk — even plant-based drinks are no exception. What’s going to be different is the taste, texture and stability of the foam. The key here is to use milk that is as fresh and cold (fridge-temperature) as possible. However, if you want to feel like a true barista and perhaps even try your hand at latte art, choose milk with a high fat and protein content. Not only will it be easier to froth, but its texture and sweetness will be no less than perfect! Ideally, you should pick special barista milk — there are more and more of these on the market.
How to Froth Milk for Your Coffee at Home?
Now when you’re familiar with the key recipes for milk-based drinks, as well as the qualities of milk that’s perfect for frothing, we can move on to the frothing itself. Even though the best results are achieved with the help of a professional steam wand (we’ll talk more about it at the end of this section), there are other, simpler methods that require less skill and can still help you enjoy a cup of coffee topped with warm, creamy milk froth. Below we will discuss milk frothers – their types and key differences.
Manual Milk Frother
There are several types of manual milk frothers — we’ll start with the simplest one. This frothing tool may remind you of a cocktail shaker. What you need to do is pour the required amount of heated milk into it, seal it and shake it until stiff foam forms. The biggest disadvantage of this milk frother is the fact that you have no choice but to use milk that’s been heated in advance. You’re also not going to be able to adjust the amount of milk froth. On the other hand, its biggest advantage lies in the fact that the same tool can be used for making piña colada or another one of your favourite cocktails.
A slightly improved version of a manual milk frother, this one looks like a small butter churn. Start by pouring milk into the jug and closing the lid. There’s a knob on top: moving it up and down will allow you to move the plunger stretching across the whole width of the frother. Keep on doing that vigorously until thick foam forms. Using the same principle, you can make some milk froth with the help of a French press. Keep in mind, however, that if you do that, you’ll have to use pre-heated milk as well.
The last manual milk frother is reminiscent of an electric egg mixer. This kind of frother is usually equipped with a switch that allows you to select the desired frothing speed. It’s particularly convenient when adjusting the consistency of frothed milk.
Automatic Milk Frother
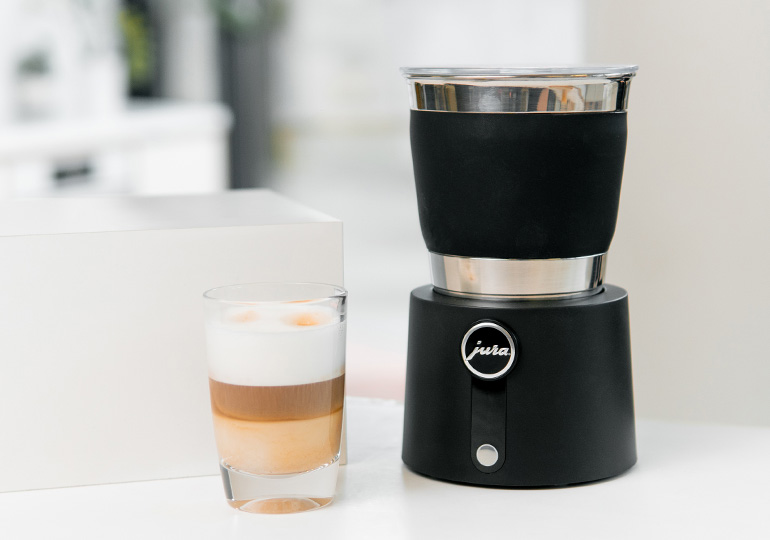
Milk frothers can also be automatic. Unlike the manual ones, automatic milk frothers let you use cold milk — it’s then heated by the device. Moreover, you can choose from several temperature levels. In addition to producing milk froth and non-frothed hot milk, some automatic milk frothers are capable of making cold milk foam as well. The latter may come in handy when preparing various iced drinks. If you’re going to purchase an automatic milk frother, make sure that the milk jug is dishwasher-safe — it’ll make the frother much easier to maintain.
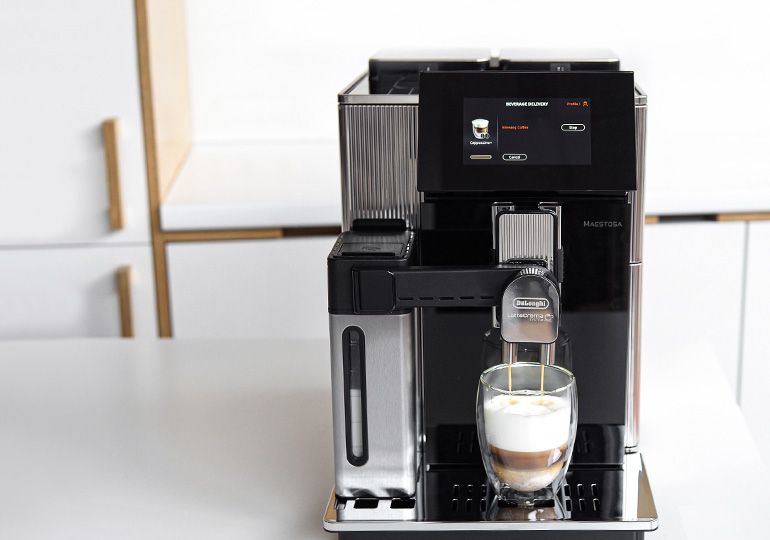
Bean-to-Cup Coffee Machine With a Milk Frother
If you’re a fan of homemade milk-based drinks, purchasing a bean-to-cup coffee machine with an integrated milk system is definitely a good idea. It’ll help you brew a cup of coffee automatically. Some of these appliances even allow you to prepare your favourite milk-based recipe with a single touch! It all depends on what kind of milk system the machine is equipped with — so don’t forget to take it into account when choosing the right coffee machine for you.
Steam Wand

Some bean-to-cup coffee machines have a steam wand, which allows the user to froth milk separately and then add it to the prepared brew. Even though steam wands can be found in most cafés, the wands that bean-to-cup coffee machines are equipped with are usually less powerful, so the process of frothing cannot be controlled to the full. Despite the fact that this type of steam wand won’t let you adjust the quantity and texture of your milk foam, this tool is still capable of producing light, warm milk froth that’s perfect for a cup of cappuccino.
Semi-Automatic Milk Frother
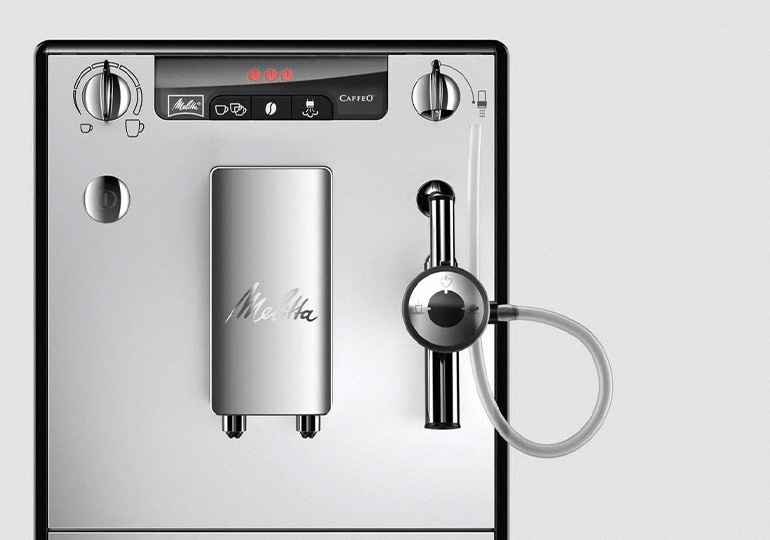
A bean-to-cup coffee machine can also be equipped with a semi-automatic system for the preparation of milk-based drinks. Such machines froth milk automatically: what you have to do is immerse the milk tube in a milk packet or jug and the machine then pours frothed milk straight into your cup. There’s a catch though! This system isn’t connected to the coffee dispenser, so you’ll have to either add the milk froth to the prepared coffee yourself or brew coffee straight into the cup with the frothed milk already in it. A semi-automatic milk frother is the ideal solution for those who don’t drink milk-based beverages that often, yet still want to prepare them conveniently when they do feel like enjoying a cup.
Automatic Milk Frothing System
Those who value both convenience and delicious froth-topped coffee drinks should go for a bean-to-cup coffee machine with an automatic milk system. The latter can be equipped with an integrated milk container or a milk tube that’s meant to be connected to the coffee dispenser. Such coffee machines are capable of preparing numerous milk-based drinks — from cappuccino to latte macchiato — at the touch of a button. So if you enjoy milk-based beverages and want to prepare them as quickly and easily as possible, trust us: you cannot go wrong with an automatic milk system.
How to Produce the Perfect Milk Froth Using an Automatic Milk Frothing System?
First, make sure to always use cold (fridge-temperature) milk — this will prevent the machine from overheating it, as well as help you avoid bubbles, bitterness and hard foam.
Secondly, although all types of milk can be frothed quite successfully, choose milk with a higher fat content (2.5–3.5%) if you’re looking to produce truly delicious, naturally sweet milk foam.
Thirdly, even though the ratios involved in the preparation of every milk-based drink are preset by the manufacturers of bean-to-cup machines, you shouldn’t be afraid to experiment and play around with the recipes while looking for the ratio and milk temperature that suit your palette best. And if you’re unhappy with the results, you can always go back to the factory settings by simply restoring them.
Professional Steam Wand
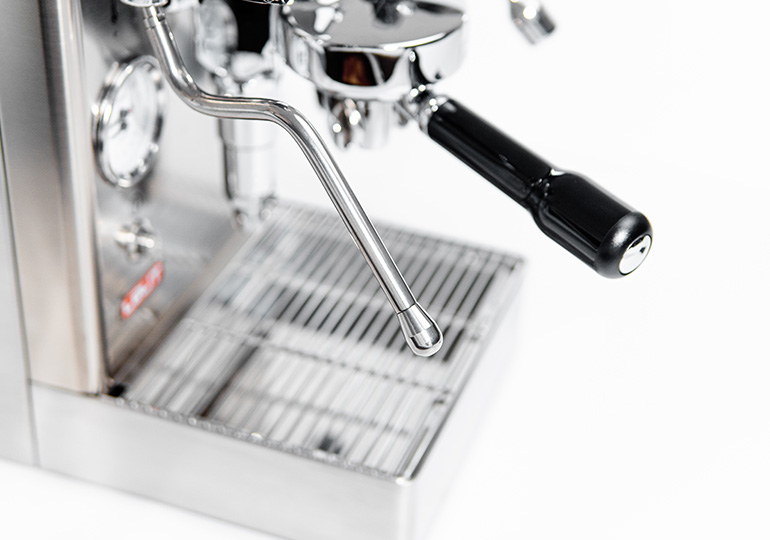
Finally, there’s the last milk frothing tool, namely a professional steam wand, which can be found on semi-automatic coffee machines. Almost every first-rate café has one, as do some aspiring amateur baristas using an espresso machine at home (read about best espresso machines for home here) These steam wands are particularly powerful, helping the steam they dispense reach as much as 120 degrees (this temperature is what steam strength depends on). Depending on the model, a steam wand of this type can have a larger or smaller number of holes. The more holes there are in it, the easier it is to control the frothing process (this number rarely exceeds four though). A device like this will allow you to obtain milk froth that’s perfect in every sense — as far as both its taste and texture are concerned. However, to make this happen, you’ll have to roll up your sleeves and prepare for some serious practice (and a litre or two of milk that might go to waste in the process!).
How to Froth Milk Like a True Barista Using a Professional Steam Wand?
Some Formula 1 fans still can’t agree on whether the car or the driver is the one to be praised for exceptional results. Similarly, in the world of coffee, experts are often asked if the perfect milk froth is truly an achievement of the barista — or if it all depends on the coffee machine the barista uses.
If we had to choose one, we’d go for the former. With enough skill, even the simplest coffee machine can yield some exceptional milk froth that’s head and shoulders above any other you’ve ever tasted. So, how can you learn to froth milk like a professional barista?
Before we move on to the steps involved in the frothing of milk, we’d like to stress that there are 3 key stages involved in this process:
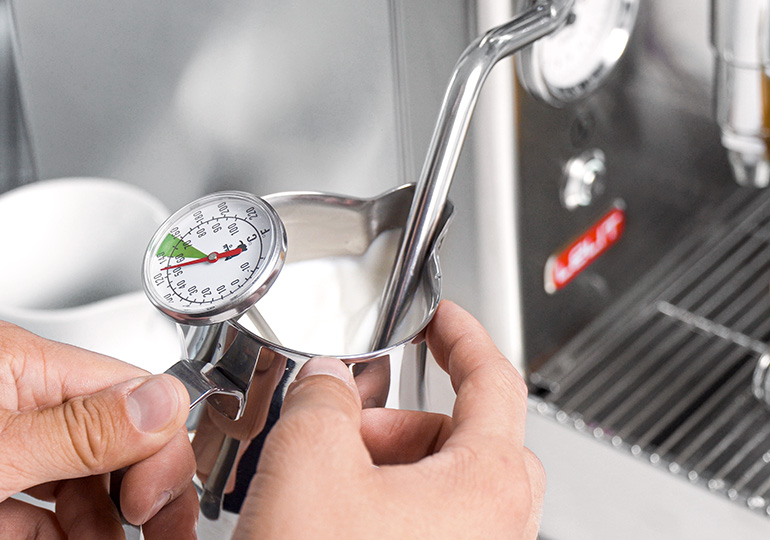
Heating milk. This stage takes place over the entirety of the frothing process. You should avoid letting the milk reach a temperature above 65 °C. Once this limit is crossed, milk becomes overheated — as a result, it loses its sweetness and doesn’t have the right texture. Remember: each time you froth milk, you’re on limited time!
Creating foam. To obtain foam, we must let some air into the milk. This is done by placing the holes of the steam wand right onto the surface of the milk. A cup of cappuccino requires more foam, so keep the wand there for 3 seconds. In the case of latte, 1.5 seconds is enough. When making flat white, limit yourself to a few hisses of the wand.
Producing the right texture. Once foam has been created, the remaining two thirds of the process should be spent mixing bubbles into the milk (this is done by allowing a whirlpool to form in the centre of the milk). Eventually, the bubbles become so minuscule that they’re practically invisible. This is the secret behind light, smooth, perfectly silky milk froth.
The biggest milk frothing mistakes usually result from the person either creating too much foam because they’re afraid of overheating the milk or, on the contrary, overheating the milk because they’re afraid of creating too much foam. It’s only a question of practice though, so you should simply keep on trying!
Instructions: Frothing Milk for Your Cappuccino, Latte or Flat White
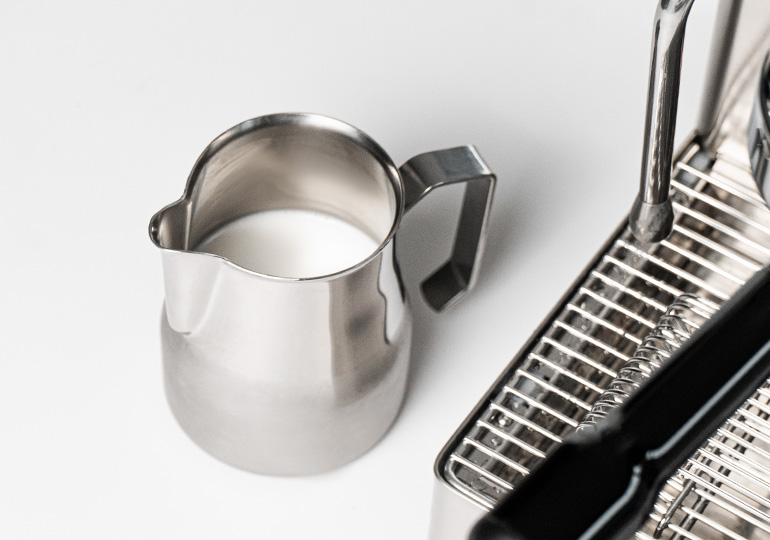
Pour cold milk into a stainless-steel jug, but be careful not to go beyond the point where the curve of the spout starts (your milk will need some extra space to rise and foam). The size of the jug you’re using, as well as the quantity of milk, generally depends on how much milk froth you’re planning to make — however, for learning purposes, we recommend sticking to a jug with a capacity of 500 ml or more, so that there’s more time for you to practise until the milk reaches the maximum allowed temperature.
Tip: to avoid ruining numerous litres of milk, start by using water with a drop of dishwashing liquid in it. This mixture works great as a substitute when you’re training!
Before you start, get rid of any residual water trapped in the steam wand.
Immerse the wand in the milk so that it rests comfortably against the spout and doesn’t move from side to side. Turn it sideways a bit. The tip of the wand must be immersed in the milk.
Using the steam handle, release steam in full force.
As soon as you do that, lower the jug a bit — the holes of the steam wand must be placed on the surface of the milk. You’ll hear a hissing sound, which means that the milk has started to foam. Keep foaming the milk for 3 seconds if you’re going to make a cup of cappuccino, 1.5 seconds if you’re making latte, or limit yourself to a few hisses if your goal is a cup of flat white.
Raise the jug again (around 1 cm of the wand must be immersed in the milk at this point). Hold the wand at an angle — this will help you create a whirlpool and mix the foam with the milk. You’ll get a dense, creamy mass.
Once you start feeling heat on your palm, know that the milk is approaching 55 °C (it’s a good idea to use a thermometer at the beginning). After a few seconds, stop dispensing steam. The temperature of your milk should now be at around 60–65 °C. Make sure not to go above this limit — this is what the taste, or the sweetness, of your milk froth depends on.
As you’re switching off steam, immerse the wand a tad deeper into the mass so that you avoid producing more foam than needed on accident.
Set the jug aside for a few seconds and allow the remaining bubbles to shrink. You’ll notice the milk gradually turning more solid — this is exactly what’s supposed to happen. You can use this pause to clean the steam wand.
Go back to the milk: twirl it around gently until its surface acquires a subtle shimmer.
Pour the milk into the cup:
Cappuccino: hold the cup with espresso at a slight angle and transfer both the liquid and foam from the jug to the cup with the help of a single quick motion. The resulting drink should look solid, viscous and glossy. It should be free of bubbles, while the foam shouldn’t be too hard or separated too much from the liquid. Once you take a sip, it should contain equal amounts of both foam and liquid.
Latte/flat white: pour the milk along the spout of the jug in a thin stream. You can also try and adorn the drink with some latte art — we’ll reveal its secrets right now!
Latte Art: Drawing With Milk Froth
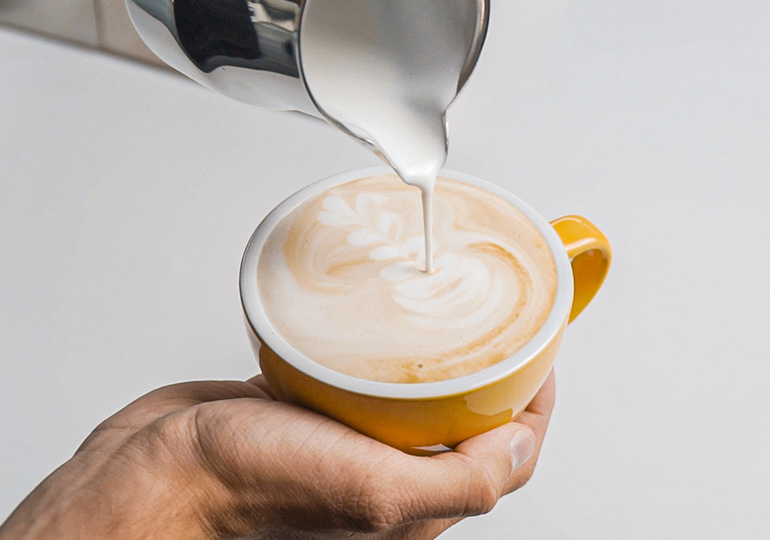
The term “latte art” is used to describe the process of drawing with milk froth. As strange as this may sound, it sprang up in numerous countries around the same time, namely the end of the 1990s. However, a man called David Schomer is credited with making this art form popular — like many contemporary coffee innovators, he grew up in Seattle (USA).
Even though modern latte art includes various different techniques and elements used to produce a certain drawing, there are two key principles to it. As you’re drawing with milk froth, imagine the cup being divided into two separate sections: the one that’s closer to you and the one that’s further from you. You can start drawing from either side — the rest is only a question of imagination and practice.
Before you start though, make sure that the consistency of the milk froth you’re using is no less than perfect and that your cup is large enough for you to fit all of the milk in before the drawing’s finished. If the consistency of the milk is just right, you’ll notice that the surface of your coffee is becoming more even as you start pouring the liquid in a thin stream and onto those spots that are darker. Once that’s done and enough milk has been added to the drink, lower the jug a bit: you’ll now be able to see white foam being poured onto the brown surface of the coffee. Instead of mixing with the beverage, it’ll stay on the surface, forming beautiful ornaments in the process.
So, how does one turn into a true latte artist whose drawings are valued by both modern art critics and regular people looking to experience something unexpected amongst their regular daily routines? If you want to surprise yourself instead of waiting for your barista to surprise you, go ahead and learn how to produce the basic drawings used in latte art. In addition to cheering you up, this may brighten the day of your loved ones too!
Tip: just like you did when teaching yourself how to froth milk, you should use regular water, a jug and a cup at the beginning of your latte artist career. Do that until you’re confident that you can control the process (i.e. the speed and movements) involved in pouring the milk from the jug and into the cup.
Latte Art: Heart
- Start drawing from the side that’s closer to you. Start pouring the milk, then put the jug closer to the surface of the coffee. You should see an apple-like shape forming.
- Keep pouring the milk until the cup is almost full.
- At the very end of this process, lift the jug up a bit, make the stream even thinner and draw a line across the apple-like shape.
Latte Art: Tulip
- Start drawing a heart — however, this time around, instead of allowing a single big apple-like shape to form, keep the apple small. Then lift the jug up a bit. Using the same sort of movement, push this apple to the other side of your cup and form a second, even smaller apple as you do that.
- Try and form as many apples as possible (make sure to keep them separate: if they merge, they’ll lose the apple-like shape and form a semicircle instead).
- Once it’s obvious that no more apples will fit into the cup, draw a line across all of them, just like you did when drawing a heart. Here’s your tulip!
Latte Art: Rozetta
- Start drawing on the side that’s further from you.
- Once all of the milk has been added and you see foam rising to the surface of the coffee, start moving the jug from side to side gently while moving it slowly towards the side of the cup that’s closer to you.
- Once you get to the edge of the cup, lift the jug up and draw a line across the resulting shape using a thin, weak stream. This will result in the drawing of an elegant fern leaf, otherwise known as a rosetta.
To Conclude…
If you’re a fan of milk-based coffee drinks and the quality of your milk froth matters to you, make sure to consider all of the nuances discussed in this post when choosing the right coffee machine or milk frothing method for you. If you’re still feeling a bit lost, however, don’t hesitate to contact the Coffee Friend’s consultants — they’ll be happy to help you pick the best coffee machine or a different milk frothing device. We’ll recommend some delicious coffees that go perfectly with velvety milk froth too, of course!